# Docker Deployment
Screenshots on this page are taken from the Chinese UI. Menu, field and button names in the text use the English UI labels.
This page describes how to install the Muyan Low-Code Platform on your own machine with Docker Compose, as a development and trial environment. To deploy to a server, also read Production Deployment; to upgrade from an older version, read Upgrade Notes.
# Target Audience
Developers and implementers of this system, and developers who want to try out the platform locally.
# Prerequisites
Linux, macOS or WSL2 with Docker and Docker Compose support
TIP
Native Windows is not supported at the moment. To run on Windows, use WSL2, or contact us through the community (opens new window).
Docker (opens new window) and Docker Compose v2 (opens new window) (the command is
docker compose)Access to the platform configuration repository
muyantech/platform. It is a private repository; after purchasing the platform, contact us through the community (opens new window) to get access.An SSH key (opens new window) configured on GitHub; the repository is cloned over SSH.
Note
Without access to the repository, the clone step below will fail.
# Components and Versions
The platform consists of the containers below. The image versions in the repository's docker-compose.yml are authoritative; the table shows the current configuration in the repository:
| Service | Image | Description |
|---|---|---|
proxy | nginx:latest | Single entry point; forwards /api/ to the backend and other requests to the frontend |
client | muyantech/frontend-next:1.0.0-beta12 | Platform frontend |
client_legacy | muyantech/frontend:0.31.0-beta5 | Legacy frontend, served under the /legacy/ path |
server | muyantech/backend:1.0.0-beta18 | Platform backend (Grails 7 + Java 25) |
database | pgvector/pgvector:0.8.0-pg17 | PostgreSQL 17 with the pgvector extension |
redis | redis:latest | Cache and distributed locks |
pgadmin | dpage/pgadmin4:latest | Web-based database administration tool |
# Installation
# Manual Installation (Recommended)
In the directory where you want to keep the platform, run:
# 1. Clone the platform configuration repository
git clone [email protected]:muyantech/platform.git
cd platform

# 2. Log in to Docker Hub with the read-only token (the backend image requires login to pull)
cat token.txt | docker login -u muyantech --password-stdin

# 3. Start all containers
docker compose up -d

# 4. Check container status; startup is complete when server shows healthy
docker compose ps
2
3
4
5
6
7
8
9
10
11
12
The first installation pulls all images and may take more than 10 minutes depending on your network. You can also check that the backend is ready with curl -s http://localhost:9080/api/actuator/health; once it returns {"status":"UP"}, the platform is accessible.
macOS users
In docker-compose.yml, the server service mounts the host's /etc/timezone (/etc/timezone:/etc/timezone:ro). If startup on macOS fails with an error about the /etc/timezone mount, delete this line from docker-compose.yml and run docker compose up -d again.
# One-Click Install Script (Not Recommended for Now)
The one-click script currently installs an old version
The muyan.sh currently online clones the old configuration repository xqliu/platform instead of muyantech/platform above: accounts that only have access to muyantech/platform fail at the clone step, and even if the clone succeeds, both the backend and the frontend it installs are 1.0.0-beta8, without the security fixes of 1.0.0-beta18. Until the script is updated, use the manual installation above. If you have already installed with the script, run docker compose images in the platform directory to check the versions.
The script's usage and what it does are described below for reference:
curl -fsSL https://muyan.io/muyan.sh | bash
If you use the https://www.muyan.io/muyan.sh address, you must include -L: it returns a 301 redirect to https://muyan.io/muyan.sh, and without following the redirect bash receives empty content, so the command simply ends without installing anything.
The script does the following, in order:
- Checks whether
docker-compose(v1) ordocker compose(v2) is available; - If a
platformdirectory already exists in the current directory, renames it toplatform_<date_time>as a backup; - Clones the configuration repository to
./platformover SSH; - Logs in to Docker Hub (
docker login -u muyantech) with the read-only tokentoken.txtfrom the repository; the backend image requires login to pull; - Starts all containers: if v1
docker-composeis installed, it runsdocker-compose up -d; otherwise it runsdocker compose up -d; - Polls
http://localhost:9080/api/actuator/healthfor up to 10 minutes until it returnsUP, then opens the platform in the browser.
# Access
# Local Access
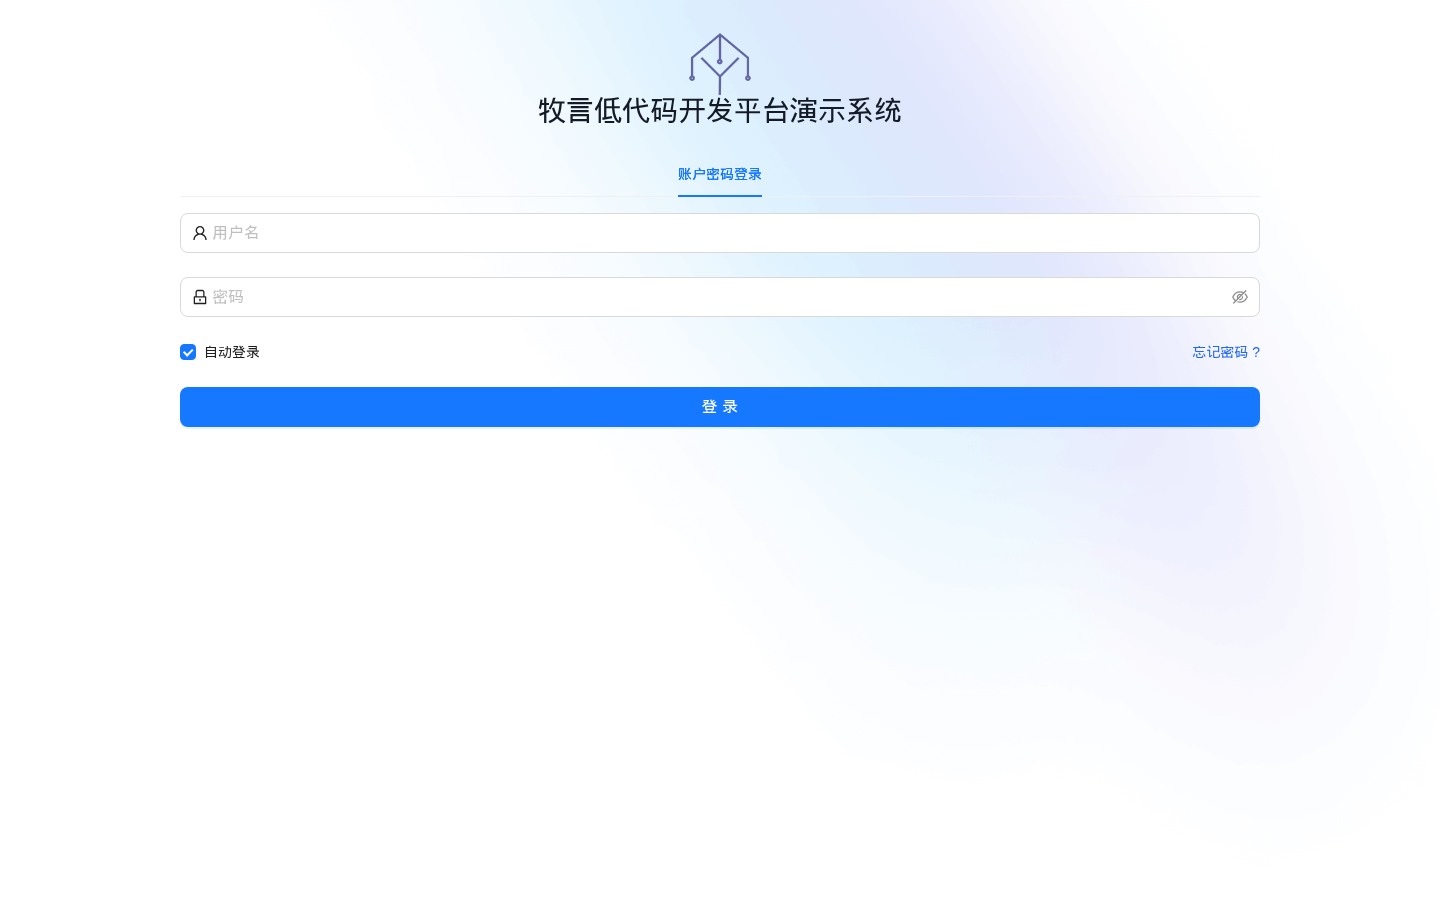
Open http://localhost:9080 (opens new window) in a browser and log in with the default account below.
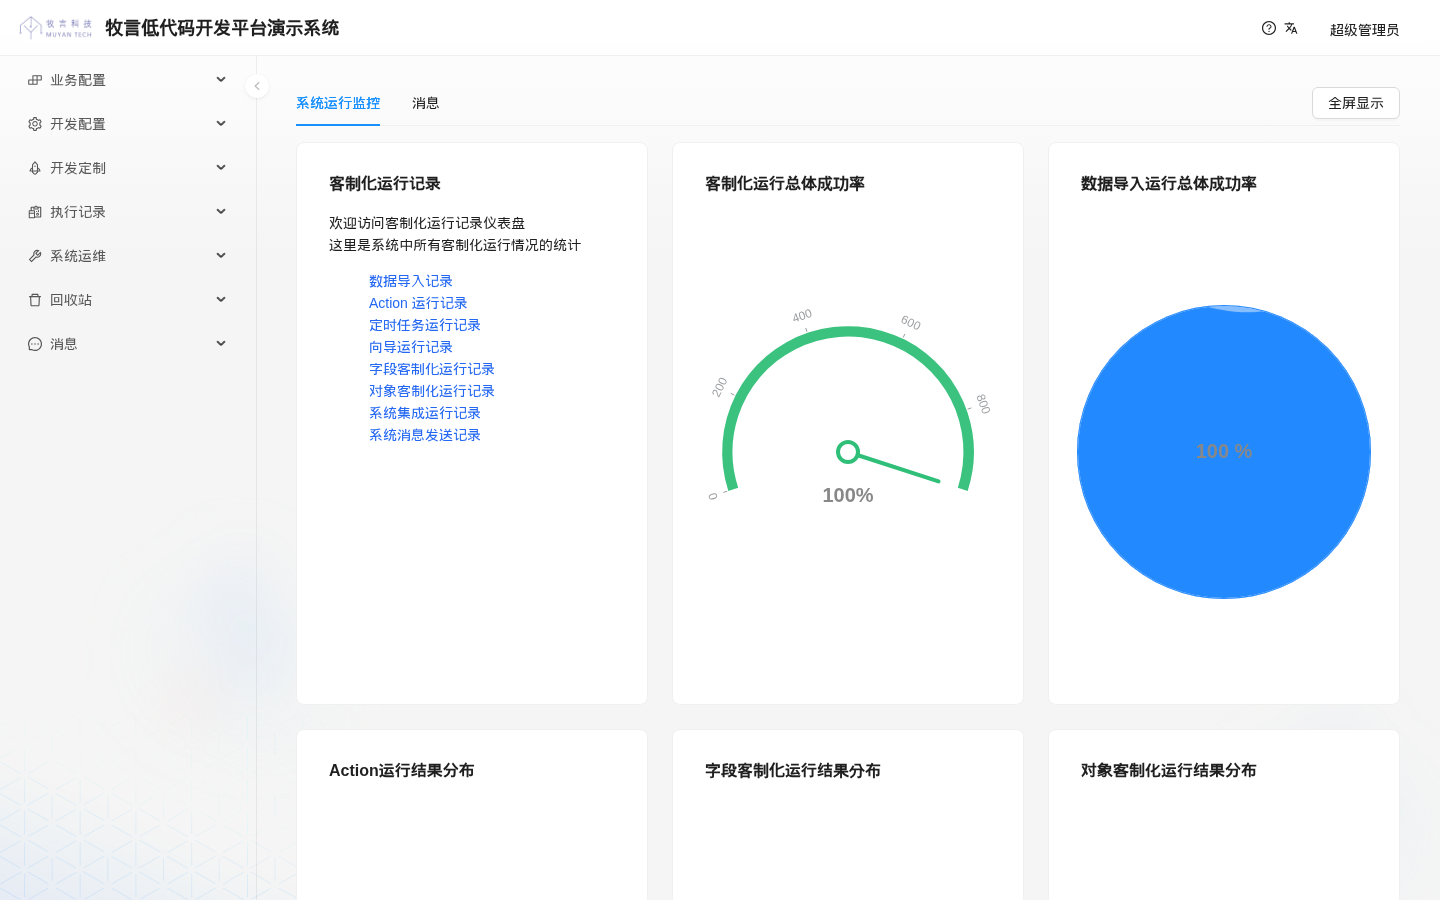
After logging in you land on the home page. The home page has two dashboard tabs, "消息" (Messages) and "系统运行监控" (System Monitoring); these dashboard names are shown in Chinese in the English UI as well. Which one is shown first is not fixed in the current version. The screenshot below shows the "系统运行监控" tab:
WARNING
In the "客制化运行记录" (Customization Execution Records) card on the home page, the three links 向导运行记录 (wizard execution records), 字段客制化运行记录 (field customization execution records) and 系统集成运行记录 (system integration execution records) point to features removed in 1.0 and show a 404 page when clicked. This is a UI issue in the current version; please ignore these three links. On the same page, the "字段客制化运行结果分布" (field customization result distribution) card also belongs to a removed feature and is empty; the scale of the "客制化运行总体成功率" (overall customization success rate) gauge shows the number of runs (for example 0–800 in the screenshot, which changes with the data) rather than 0–100%. These are all UI issues in the current version.
Both the frontend and the backend are accessed through port 9080 of the proxy service: the pages are at http://localhost:9080/, and the backend API is at http://localhost:9080/api/.
# LAN Access
Port 9080 is mapped on all network interfaces of the host, so machines on the LAN can access the platform directly by the host's IP, for example http://192.168.0.2:9080, without any extra configuration.
# Start Developing
# Project Structure
After installation, go into the platform directory. The main files in the repository are:
.
├── codes                                   # Plugin project (Gradle)
│   ├── build.gradle                        # Plugin build configuration
│   ├── settings.gradle
│   ├── gradlew / gradlew.bat               # Gradle wrapper
│   ├── src/main/groovy/tech/muyan/plugin
│   │   └── PluginExample.java              # Plugin example
│   ├── data                                # Application seed data, mounted at /app/plugin/data in the container
│   │   ├── csv                             # Seed CSV (domain models, forms, menus, users, etc.)
│   │   ├── groovy                          # Groovy source of dynamic logic
│   │   ├── attachments                     # Attachments referenced by the seed data
│   │   ├── css                             # Custom styles
│   │   └── prompts                         # Prompt files
│   └── ui-component                        # Custom frontend component project
├── db-seed-data
│   └── initdb                              # Scripts run when the database is initialized for the first time
│       ├── 00-restore-dump.sh              # Restores the initial data from seed-data.dump
│       ├── 01-create-pgvector-extension.sql
│       └── seed-data.dump                  # Initial database dump
├── runtime                                 # Runtime directory
│   ├── attachments                         # Uploaded attachments, mounted at /app/attachments in the container
│   ├── client / client_legacy              # Frontend logs; you can put a self-built frontend here
│   ├── pgadmin                             # pgAdmin configuration (servers.json, pgpass)
│   ├── proxy/conf.d/default.conf           # nginx forwarding configuration
│   └── server                              # You can put a self-built backend boot.jar here
├── docker-compose.yml                      # Container orchestration configuration
├── muyan.sh                                # One-click install script
├── start.sh                                # Mounts runtime/server/boot.jar if present, then starts (uses docker-compose v1 commands)
└── token.txt                               # Docker Hub read-only token
2
3
4
5
6
7
8
9
10
11
12
13
14
15
16
17
18
19
20
21
22
23
24
25
26
27
28
29
Database data is stored in runtime/database/data, which is created automatically on first startup and is not in the repository.
Seed CSV files go directly under codes/data/csv; they are no longer split into per-tenant subdirectories. The backend imports them at startup from ${SEED_DATA_FOLDER}/csv (that is, /app/plugin/data/csv in the container).
# Start Coding
- Follow the tutorial Building a Simple CRM System from Scratch
- Start the system design, see System Design Guide
- Define domain models, forms, actions, etc., see Data Import and CSV File Templates
- Develop plugins, see Plugin Development
The platform uses a unified frontend, so you usually do not need to develop a frontend yourself. When you need custom UI components, see the codes/ui-component project in the repository and Plugin Development.
# Managing the Application
In the platform directory, run:
# Start
docker compose up -d

# Stop
docker compose down

# View backend logs
docker compose logs -f server
2
3
4
5
6
7
8
# Upgrading to a New Version
When a new version of the platform is released, the image versions in the repository's docker-compose.yml are updated accordingly. In the platform directory, run:
git pull && docker compose pull && docker compose up -d
If you have changed files in the repository locally (for example docker-compose.yml or default.conf), git pull may conflict; back them up or run git stash first.
Before upgrading, read the Upgrade Notes, especially the anonymous call change in 1.0.0-beta18.
# Checking the Current Version
docker compose images
Example output:
CONTAINER                  REPOSITORY                TAG            ...
platform-client-1          muyantech/frontend-next   1.0.0-beta12   ...
platform-client_legacy-1   muyantech/frontend        0.31.0-beta5   ...
platform-database-1        pgvector/pgvector         0.8.0-pg17     ...
platform-server-1          muyantech/backend         1.0.0-beta18   ...
2
3
4
5
The TAG column is the running version.
WARNING
The data under System Ops > Version in the UI currently stops at 0.28.8 and does not reflect the backend version actually running; rely on docker compose images instead.
# Related Configuration
# Backend Environment Variables
Environment variables of the server service in docker-compose.yml:
| Variable | Default | Description |
|---|---|---|
JDBC_DATABASE_URL | jdbc:postgresql://database:5432/application | Database connection URL |
JDBC_DATABASE_USERNAME | postgres | Database username |
JDBC_DATABASE_PASSWORD | password | Database password; must match POSTGRES_PASSWORD of the database service |
REDIS_URL | redis://redis:6379 | Redis URL. REDIS_PASSWORD and REDIS_DATABASE are also available |
SEED_DATA_FOLDER | /app/plugin/data | Application seed data directory; the backend imports from its csv subdirectory. Defaults to /app/data when not set |
JAVA_OPTS | Enables remote debugging on 5005 | Additional JVM options, for example the memory limit -Xmx4g |
GRAILS_ENV | development | Runtime environment. Do not change it casually. Under development, platform model definitions and seed data are refreshed on every startup |
TENANT_ID | ${TENANT_ID:-muyan} | Tenant name; see Changing the Default Tenant below |
JWT_SECRET | Not set (uses the default value built into the image) | Signing key for login tokens. Must be set when deploying to a server; see Production Deployment |
WARNING
docker-compose.yml also contains four variables: ISOLATION_REQUIRED, ISOLATION_PLUGIN_VERSION, ISOLATION_PLUGIN_DIGEST and TENANT_HEADER_TRUSTED. The current backend version (1.0.0-beta18) does not read them, so changing them has no effect; leave them as they are.
In addition, system configuration (DynamicConfig) can also be overridden with environment variables: replace . in the configuration key with _ to get the variable name; when the environment variable exists, its value takes precedence.
# Changing the Default Tenant
The tenant name serves two purposes:
- It is the prefix of the data tables of dynamic domain models, for example
muyan_sample_dynamic_order_domain; - It is the value of the
tenantcolumn of every record.
The default tenant is muyan. Changing the tenant requires changes in two places, the backend and nginx. It is best done at first installation, before there is any business data.
# 1. Set TENANT_ID
Create a .env file in the platform directory (Docker Compose reads it automatically):
TENANT_ID=acme
You can also run export TENANT_ID=acme before starting.
# 2. Change the Tenant Request Header Forwarded by nginx
runtime/proxy/conf.d/default.conf contains 12 occurrences of proxy_set_header X-Muyan-Tenant muyan;, and the backend determines the tenant from this request header. Change all of them to the new tenant name:
sed -i 's/X-Muyan-Tenant muyan;/X-Muyan-Tenant acme;/' runtime/proxy/conf.d/default.conf
grep -c 'X-Muyan-Tenant acme' runtime/proxy/conf.d/default.conf   # should print 12
2
If you change only TENANT_ID and not this file, all requests fail and the backend returns Tenant muyan not found in system.
# 3. Restart
docker compose up -d --force-recreate server proxy
At startup, the backend creates a tenant record for the new tenant and imports the platform seed data and the application seed data under codes/data/csv into it. The default accounts are unchanged; you can still log in as [email protected].
WARNING
- The data of the original tenant remains in the database, but is not visible after switching tenants.
- When two tenants exist in the database, the backend startup log contains an error
Failed to execute after import sql ... more than one row returned by a subquery. In testing, it does not affect login or use.
# Additional Notes
# Ports
| Component | Host port | Access |
|---|---|---|
| Frontend and backend (proxy) | 9080 | Pages at http://localhost:9080, API at http://localhost:9080/api/ |
| pgAdmin | 5433 | http://localhost:5433 |
| Backend remote debugging | 5005 | In IDEA, create a Remote JVM Debug configuration connecting to localhost:5005 |
| Backend 8080 | Not mapped | Only reachable inside the container network; access it through /api/ on 9080 |
| PostgreSQL 5432 | Not mapped | docker compose exec database psql -U postgres -d application, or use pgAdmin |
| Redis 6379 | Not mapped | docker compose exec redis redis-cli |
If ports 9080, 5433 or 5005 are already in use on the host, change the left-hand port in the ports of the corresponding service in docker-compose.yml.
# Default Usernames and Passwords
| Component | Username | Password |
|---|---|---|
| Platform super administrator (admin group) | [email protected] | password |
| Sample user "项目经理" (project manager, business group) | [email protected] | password |
| Sample user "财务" (finance, business group) | [email protected] | password |
| pgAdmin | [email protected] | secret |
| PostgreSQL | postgres | password |
Platform users are defined in codes/data/csv/User.csv, and their user groups in UserGroup.csv. The PostgreSQL database name is application.
Change all of the default passwords above before deploying to a server.
# Docker Volumes
| Component | Path in container | Path on host | Description |
|---|---|---|---|
| PostgreSQL | /var/lib/postgresql/data | ./runtime/database/data | Database data files |
| PostgreSQL | /docker-entrypoint-initdb.d/ | ./db-seed-data/initdb | First-time initialization scripts and initial data |
| Backend | /app/plugin/data/csv | ./codes/data/csv | Application seed CSV |
| Backend | /app/plugin/data/groovy | ./codes/data/groovy | Dynamic logic source |
| Backend | /app/plugin/data/attachments | ./codes/data/attachments | Seed data attachments |
| Backend | /app/plugin/data/css | ./codes/data/css | Custom styles |
| Backend | /app/plugin/data/prompts | ./codes/data/prompts | Prompt files |
| Backend | /app/attachments | ./runtime/attachments | Attachments uploaded by users |
| Backend | /etc/timezone (read-only) | /etc/timezone | Host time zone |
| proxy | /etc/nginx/conf.d | ./runtime/proxy/conf.d | nginx forwarding configuration |
| proxy | /var/log/nginx | ./runtime/proxy/logs | nginx logs |
| client | /var/log/nginx | ./runtime/client/logs | Frontend nginx logs |
| client_legacy | /var/log/nginx | ./runtime/client_legacy/logs | Legacy frontend nginx logs |
| pgAdmin | /var/lib/pgadmin | ./runtime/pgadmin/data | pgAdmin data |
| pgAdmin | /pgadmin4/config | ./runtime/pgadmin/config | pgAdmin configuration |
| pgAdmin | /var/log/pgadmin | ./runtime/pgadmin/log | pgAdmin logs |
| pgAdmin | /var/lib/pgadmin/storage/db_muyan.cloud/pgpass | ./runtime/pgadmin/pgpass | pgAdmin database password file |
db-seed-data/initdb only runs when runtime/database/data is empty (first startup). To reset to a fresh initial database, run docker compose down, delete runtime/database/data, then start again. This erases all data, so back up first.