# Production Environment Deployment
This document describes a deployment option suitable for production environments.
For production environment deployment, you can use the https://github.com/muyantech/installer (opens new window) all-in-one installation package, which supports the following features:
- This all-in-one installation package contains all the related dependent components needed to run the system.
- This all-in-one installation package is based on Docker Swarm and GlusterFS distributed file system, supporting multi-node and high availability.
TIP
If you purchased the system from https://lcdp.ai, you can get help from our technical support team.
# Target Audience
The target audience for this document is: System implementers
# Prerequisites
- This installation package has been tested on English versions of Ubuntu 20.04 LTS and 22.04 LTS operating systems.
- The system needs to create an operating system user named
ubuntuwho can usesudowithout a password.
# Component Description
This installer will install all components into the my stack in the swarm
cluster.
The following lists the main related software and their versions used:
| Software | Current Version | Description |
|---|---|---|
| Docker | 24.0.6 | Docker Engine |
| glusterfs | 10.1 | GlusterFS distributed storage |
| ntp | Time server |
The following lists the services included in the current all-in-one installation package:
| Component | Image and Version | Description | Service Name in Swarm |
|---|---|---|---|
| proxy | nginx:1.25.2 | Web server, running in front of client and server services, used for service routing | my_proxy |
| client | nginx:1.25.2 | Frontend service | my_client |
| redis | redis:7.0.10 | Redis server, used for backend service caching and queue service | my_redis |
| database | timescale/timescaledb-ha:pg14-all | Database server, used for backend service data storage with time-series database functionality | my_database |
| pgadmin | dpage/pgadmin4:7.7 | Database maintenance tool, used to connect to the database via web interface and execute SQL, etc. | my_pgadmin |
| server | adoptopenjdk:11-jdk-hotspot | Backend service | my_server |
# System Installation
Installation steps are as follows:
- Log in as root user, create ubuntu user and set its sudo permissions
# Create ubuntu user
useradd -m -s /bin/bash ubuntu

# Edit sudo configuration file
visudo

# Add the following line at the end of the file to set ubuntu user's sudo permissions
ubuntu ALL=(ALL) NOPASSWD:ALL

# Save and exit
2
3
4
5
6
7
8
9
10
- Clone the repository from https://github.com/muyantech/installer (opens new window).
Large files like installation packages are saved using git lfs and need to be downloaded using git lfs.
# Install git lfs
apt update
apt install git-lfs

# Clone the repository
git clone [email protected]:muyantech/installer.git

# Download all files managed by git lfs
cd installer
git lfs pull
2
3
4
5
6
7
8
9
10
- Edit the .env file and modify the relevant installation parameters. The relevant installation parameters are described in detail as follows:
# Whether to enable GlusterFS (NFS, only needed for multi-node mode)
# If the system needs to run on multiple nodes, please set this option to true
GLUSTER_ENABLED=false

# Whether to enable HTTPS, if enabled, you need to provide SSL certificate to /assets/configs/proxy/ssl folder
# If you want to enable HTTPS access to the system, you need to put the SSL certificate in the /assets/configs/proxy/ssl directory before starting the installation
HTTPS_ENABLED=false

# Extra hosts, will be injected to backend service, the docker swarm service is called my_server
# Format: "hostname:ip"
# Please keep this placeholder even if you don't need it
# Additional hosts DNS mapping needed in the docker container of the backend service, the
 service name in the swarm cluster is my_server
# Format: "hostname:ip address"
# If not needed, please keep the placeholder line below unchanged
EXTRA_HOSTS="samt:192.168.0.1"

# Domain name to access the system
# Domain name to access the system
NGINX_HOST=samt.myddm.com
2
3
4
5
6
7
8
9
10
11
12
13
14
15
16
17
18
19
20
- In the installation package directory, run the following command to install the system:
# Run the installer
bash +x cluster-setup.sh
2
The following is the default interface of the installer. Please read the
relevant prompts carefully and record the installation log output file path. You
can use tail -f <installation log output path> to track the detailed
installation process log.
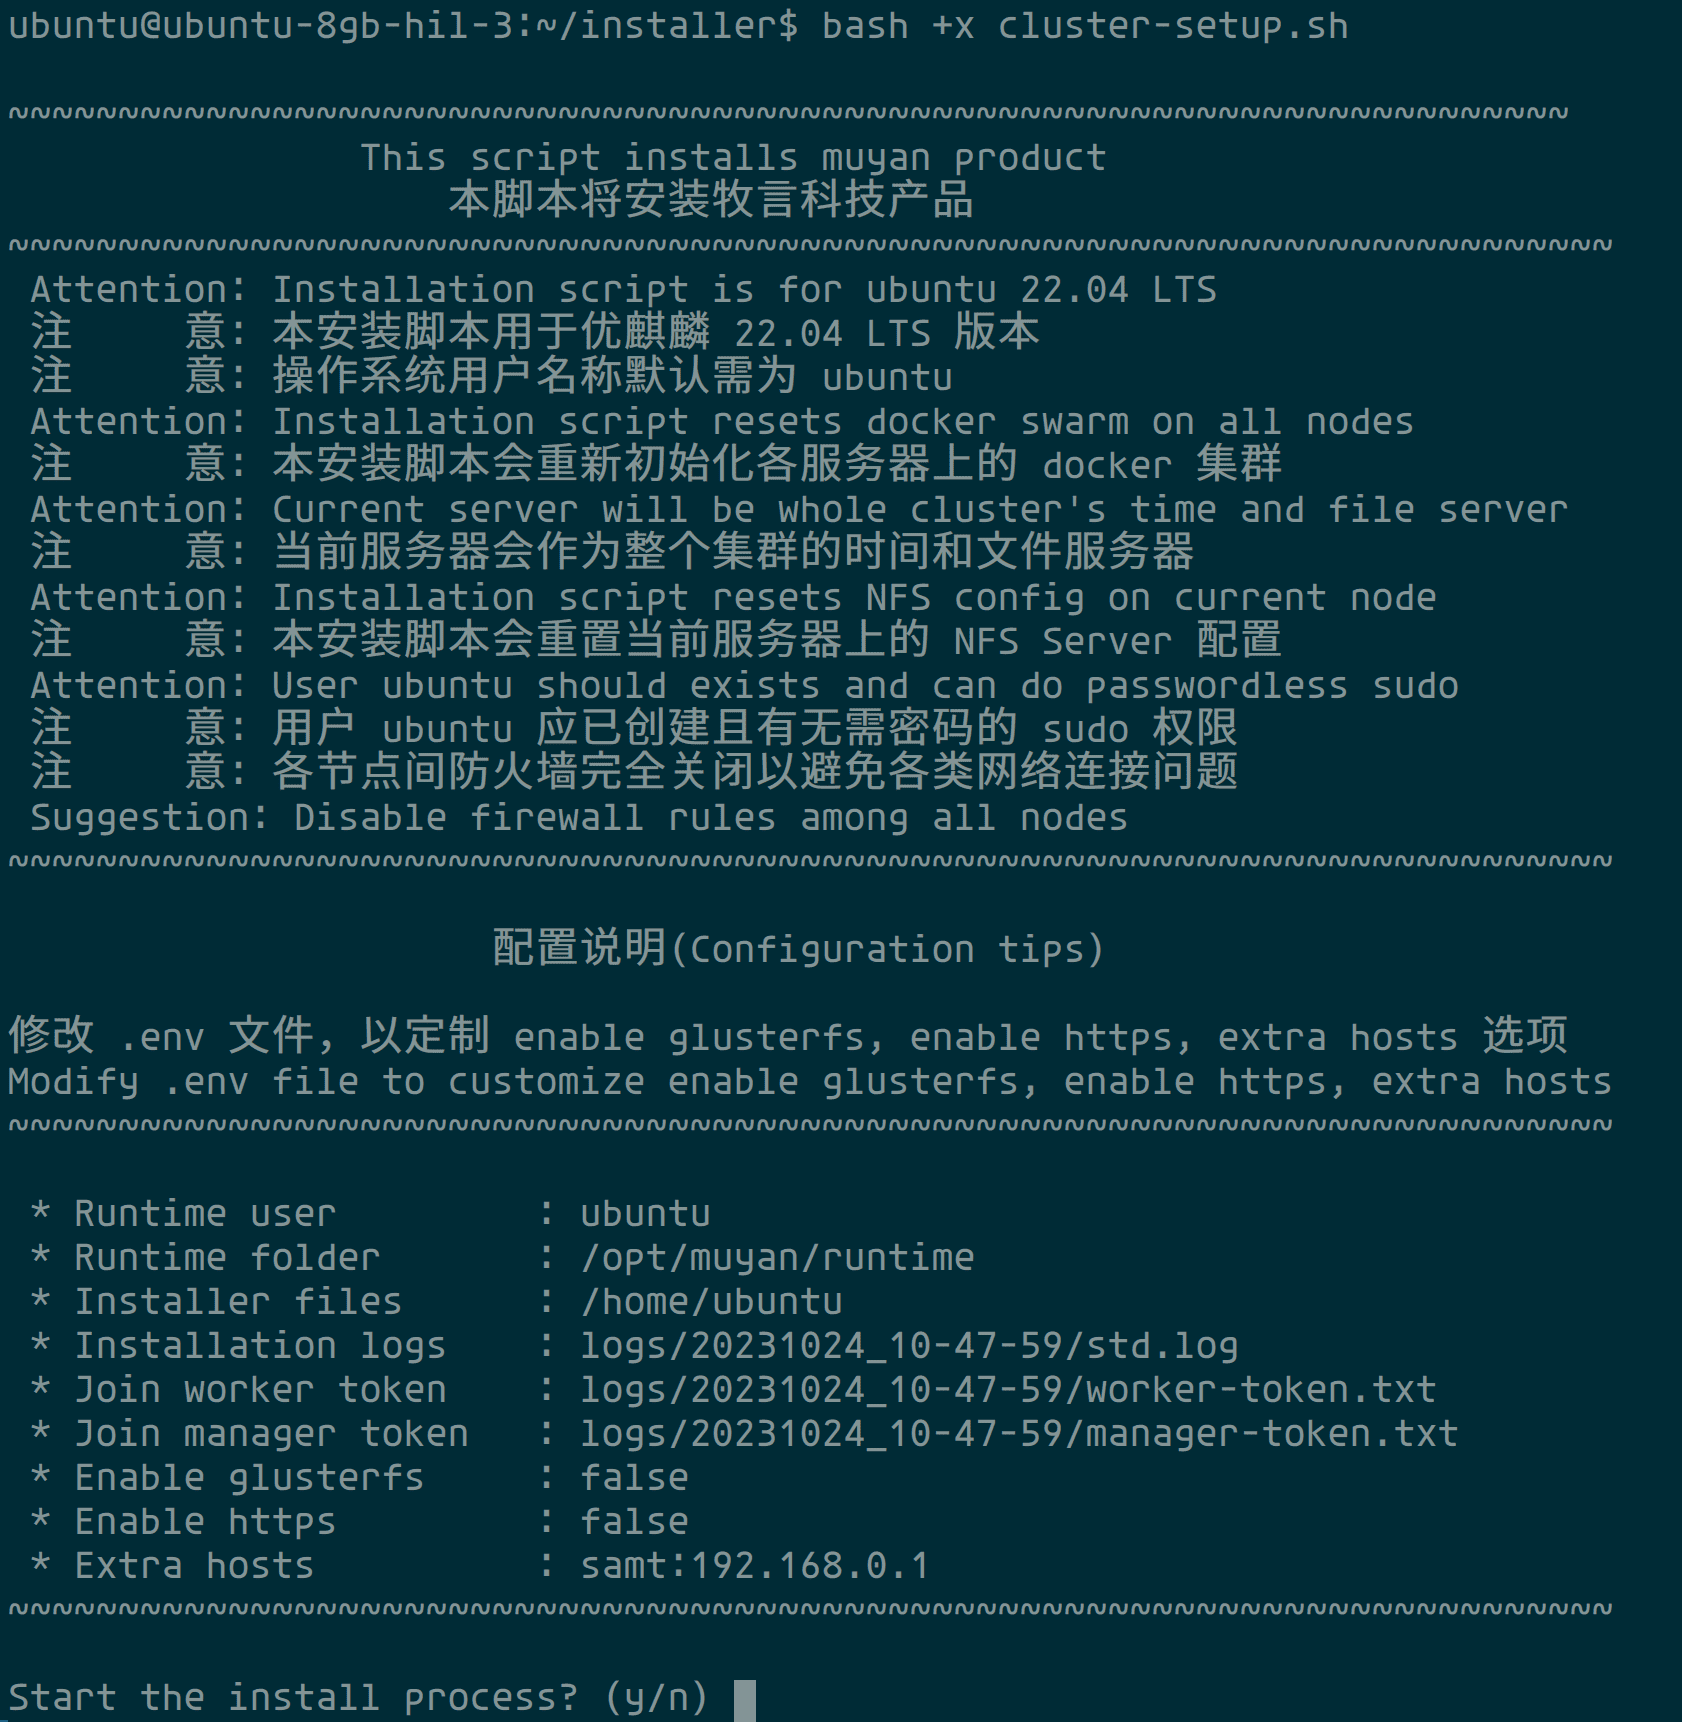
After confirming that the relevant configuration is correct, enter y to start
the installation process.
The system will display the following interface and stop the currently running services:
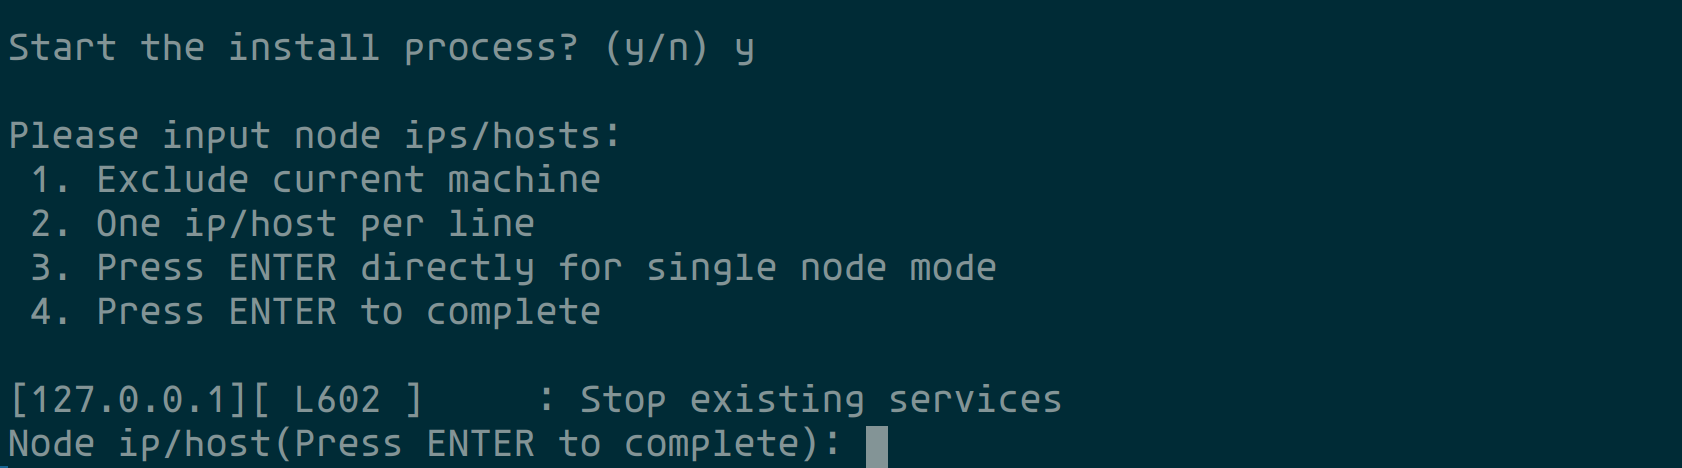
According to the prompt,
- If installing the system on a single server, just press Enter.
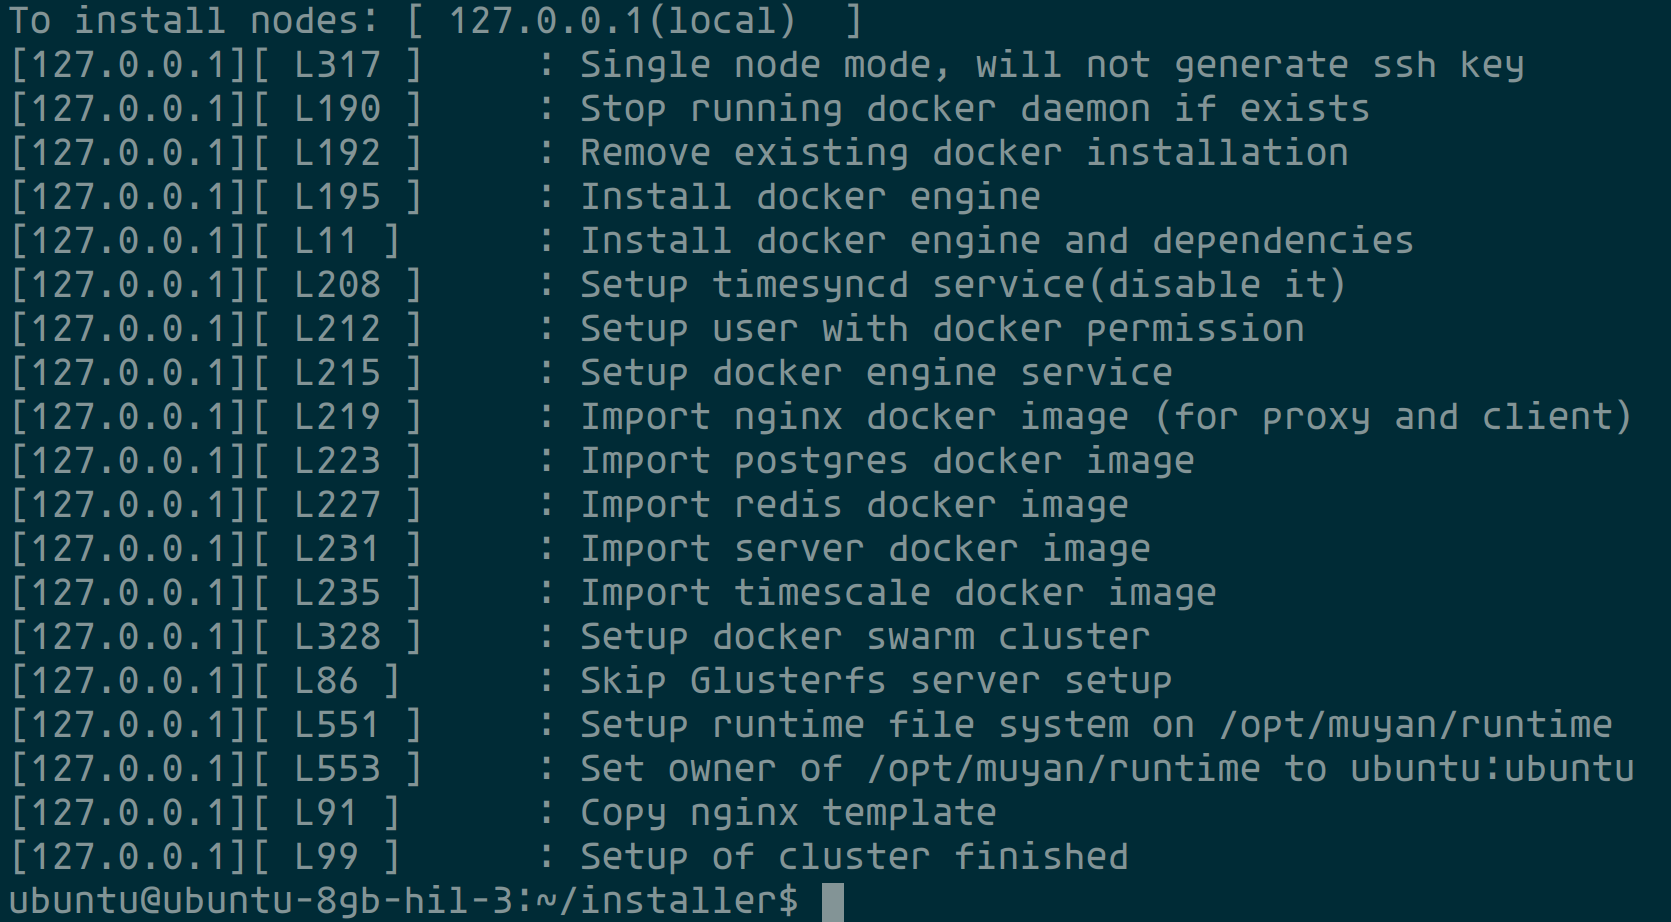
- If installing the system on a cluster of multiple servers, please enter the IP addresses of other servers in the cluster. Press Enter after entering each one, and press Enter twice when finished.
After the input is complete, the system will start the installation process and automatically start all services after the installation is complete.
# Service Refresh
Run the following command to refresh one or all services:
# Refresh a specific service
bash +x scripts/refresh-service.sh <service-name>

# Refresh all services, refresh Swarm cluster configuration,
# After modifying the docker-compose.yml file, execute the following command to refresh the cluster configuration
bash +x scripts/refresh-service.sh
2
3
4
5
6
Available service names are as follows:
- my_proxy
- my_client
- my_redis
- my_database
- my_pgadmin
- my_server
# Program Update
# Update Frontend Program
- Copy the compiled files of the frontend to the directory
<installer>/assets/applications/client. - In the
<installer>directory, executebash +x scripts/refresh-service.sh my_client
After completing the above operations, you can deploy the new version of the frontend and refresh the corresponding service.
# Update Backend Program
- Copy the compiled
jarfile of the backend to the directory<installer>/assets/applications/server, and rename it toapp.jar. - In the
<installer>directory, executebash +x scripts/refresh-service.sh my_server
After completing the above operations, you can deploy the new version of the backend and refresh the corresponding service.
# Additional Information
# Program File Paths
| Component | Directory | Description |
|---|---|---|
| client | /opt/muyan/runtime/applications/client | Path for frontend service's css, html, and js files |
| server | /opt/muyan/runtime/applications/server | Path for backend service's jar file, the jar file should be named app.jar |
# Component Configuration File Paths
| Component | Configuration File | Description |
|---|---|---|
| proxy | /opt/muyan/runtime/configs/proxy/proxy.conf.template | Nginx configuration for Proxy service |
| client | /opt/muyan/runtime/configs/client/nginx.conf | Nginx configuration for Client service |
| database | /opt/muyan/runtime/configs/postgres/postgresql.conf | Main configuration for database service |
| database | /opt/muyan/runtime/configs/postgres/pg_hba.conf | Access permission config for database |
| redis | /opt/muyan/runtime/configs/redis/redis.conf | Configuration for Redis service |
| pgadmin | /opt/muyan/runtime/pgadmin/config/servers.json | Configuration for pgadmin service |
| pgadmin | /opt/muyan/runtime/pgadmin/pgpass | Server configuration for pgadmin service |
# Component Data File Paths
| Component | Directory | Description |
|---|---|---|
| server | /opt/muyan/runtime/data/attachments | Storage path for attachment files uploaded by users when using LOCAL_FILE storage engine |
| server | /opt/muyan/runtime/data/seed | Seed data directory, the system will read seed data from this directory during startup |
| database | /opt/muyan/runtime/data/postgres | Data directory for database service |
| redis | /opt/muyan/runtime/data/redis | Data persistence directory for Redis service |
| pgadmin | /opt/muyan/runtime/pgadmin/data | Data persistence directory for pgadmin service |
TIP
If there is seed data in the directory /opt/muyan/runtime/data/seed, the seed
data should be complete. The priority of seed data in this directory is higher
than the priority of seed data packaged in the running jar file.
# Component Log Directory List
| Component | Directory | Description |
|---|---|---|
| proxy | /opt/muyan/runtime/logs/proxy | Access and error logs for proxy service |
| client | /opt/muyan/runtime/logs/client | Access and error logs for client service |
| server | /opt/muyan/runtime/logs/server | Logs for server service |
| database | /opt/muyan/runtime/logs/postgres | Logs for database service |
| redis | /opt/muyan/runtime/logs/redis | Logs for redis service |
| pgadmin | /opt/muyan/runtime/pgadmin/log | Logs for pgadmin service |
# Command Reference
# Docker Swarm Related Commands
- View logs of a specific service
# View logs of the service named my_client
docker service logs my_client
2
- Force restart a service
# Force restart the service named my_client
docker service update my_client --force
2
- View the current running instance list and status of a service
# View the instance list and status of the service named my_server
docker service ps my_server
2
- List all nodes in the swarm cluster and their status
# List all nodes
docker node ls
# View the status of the current node
docker node inspect self
 --pretty
# View the detailed status of a specific node
docker node inspect <NODE-ID> --pretty
2
3
4
5
6
7
- Inspect a specific service
# View the detailed status of a service
docker service inspect --pretty <service_name>
2
# GlusterFS Related Commands
- Mount remote volume to local directory
# Please note that the glusterfs volume must be mounted to be accessed locally
# And the client should write to this mounted directory,
# Not the gluster brick folder
mount -t glusterfs 172.104.
32.234:/my-runtime /opt/muyan/runtime
2
3
4
5
- Enable self-healing every ten minutes to repair files that need repair (to be repaired)
gluster volume heal my-runtime enable
- View files in split brain status
gluster volume heal my-runtime info split-brain
- Mount disk according to /etc/fstab
mount -av
- Delete existing volume
gluster volume stop my-runtime
- Remove a brick, set replica to 2 --> If replica is reduced, need to use force
gluster volume remove-brick my-runtime replica 2 139.177.191.133:/opt/muyan/gluster force
gluster volume remove-brick my-runtime replica 2 172.104.179.24:/opt/muyan/gluster force
2
- Remove a node from peer pool
gluster peer detach 172.104.179.24
- Delete volume
gluster volume delete my-runtime
2
# Redis Related Commands
- Monitor Redis key deletions
# Execute inside redis-cli
# Config event log for redis key changes
# https://stackoverflow.com/questions/40436417/redis-keys-are-getting-deleted-automatically
CONFIG SET notify-keyspace-events AKE
2
3
4